Blog

  • Adding Plants to Your Desk Setup

    Adding Plants to Your Desk Setup

    I remember sitting in a cramped, windowless coworking space in Berlin last year, staring at a massive, dying Monstera that looked more like a chore than a piece of decor. Everyone around me was obsessed with these high-maintenance jungle aesthetics, but honestly? Most of that “aesthetic” advice is just clutter disguised as wellness. If a single desk plant requires a specialized humidity monitor and a weekly schedule just to stay alive, it’s not a tool for focus—it’s just another piece of hardware you have to manage. I don’t have the bandwidth for that, and if you’re trying to build a streamlined, portable setup, you shouldn’t either.

    I’m not here to sell you on a lifestyle you can’t maintain while moving between cities or working from a cafe. Instead, I’m going to show you how to select a low-maintenance desk plant that actually fits into a minimalist, tech-focused workflow. We’re going to talk about greenery that stays out of your way, thrives on neglect, and adds a bit of life to your setup without breaking your mental flow. No hype, no expensive soil kits—just practical choices for a clean workspace.

    Table of Contents

    Low Light Office Plants Nature That Adapts to Your Environment

    Low Light Office Plants Nature That Adapts to Your Environment

    Let’s be real: most of the spots I work from—whether it’s a corner of a cafe or a dim Airbnb—don’t exactly have floor-to-ceiling windows. If you’re relying on a sun-drenched windowsill to keep your greenery alive, you’re setting yourself up for a dead plant within a week. That’s why I always lean toward low light office plants like Snake Plants or ZZ Plants. They’re basically bulletproof; they don’t need much attention, and they thrive in those shadowed corners of a setup where most things would just wither away.

    I also try to prioritize air purifying desk plants because, let’s face it, sitting in a small, enclosed room all day can feel pretty stale. A Pothos is my go-to here. It’s lightweight, grows in almost any lighting condition, and the trailing vines add a bit of organic texture to a clean, minimalist desk without feeling like clutter. The goal isn’t to build a jungle; it’s to add a bit of life that doesn’t require a second job just to keep it breathing.

    Air Purifying Desk Plants Clearing the Mental Fog Seamlessly

    Air Purifying Desk Plants Clearing the Mental Fog Seamlessly

    When you’re deep in a flow state, trying to troubleshoot a cloud deployment or refactor a script, the last thing you need is a stale, stuffy room making your head spin. I’ve noticed that when I’m working in cramped apartments or hotel rooms with poor ventilation, that mental fog hits way harder. Integrating air purifying desk plants into your setup isn’t just about the aesthetic; it’s about keeping the air—and your brain—clear. Plants like the Snake Plant or Peace Lily act as silent, biological filters, scrubbing out toxins while you focus on your screen.

    The trick is choosing species that don’t require a massive amount of attention. I don’t have time for a high-maintenance jungle when I’m moving between cities. I usually opt for small potted plants for workspace efficiency—things that fit easily next to my mechanical keyboard without taking up precious real estate. You want greenery that works in the background, providing a subtle boost to your environment without adding another layer of complexity to your daily routine. Keep it simple, keep it functional, and let the plants do the heavy lifting for your air quality.

    Keeping It Seamless: How to Manage Greenery Without the Maintenance Overhead

    • Stick to the “set and forget” rule. If a plant requires daily attention or a complex watering schedule, it’s just another piece of clutter competing for your focus. Stick to succulents or snake plants that can handle a bit of neglect while you’re deep in a sprint.
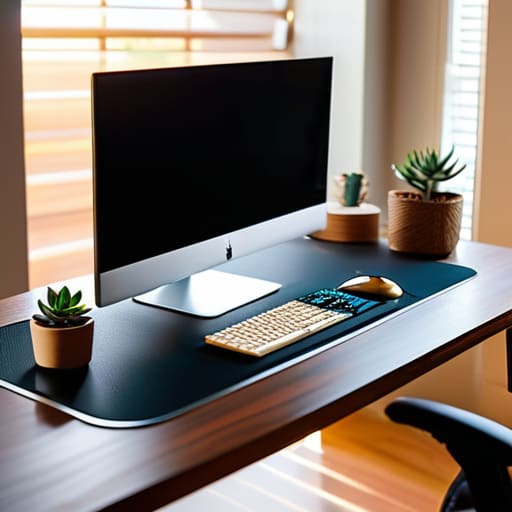
    • Match your pot to your aesthetic. I can’t stand seeing a bright plastic nursery pot clashing with a clean, minimalist desk setup. Grab some matte ceramic or concrete planters that blend into your workspace rather than standing out like a sore thumb.
    • Watch your cable management. I’ve seen too many people place plants right next to power strips or cable hubs, only to have a watering mishap fry their gear. Keep your greenery a safe distance from your tech to avoid any accidental short circuits.
    • Scale for your surface area. Don’t let a massive Monstera take over your entire desk and eat into your mouse movement space. If you’re working on a compact setup, stick to smaller, architectural plants that provide visual relief without sacrificing your workflow.
    • Don’t forget the light assessment. Before you buy anything, actually check your setup. If you’re working in a corner with zero natural light, don’t try to force a high-maintenance tropical plant to live there; you’ll just end up with a dead plant and more mental clutter.

    Final Thoughts: Keeping Your Setup Clean and Functional

    Prioritize low-maintenance species so your plants don’t become another “task” on your to-do list that interrupts your deep work.

    Match your greenery to your specific lighting conditions; don’t force a high-maintenance plant into a corner that’s destined to kill it.

    Use small, minimalist pots that fit your aesthetic without cluttering your desk real estate or getting in the way of your gear.

    The Minimalist's Greenery

    A desk plant shouldn’t be another piece of clutter you have to manage; it should be a quiet, living part of your setup that breathes life into your space without disrupting your focus.

    Elias Vandermeer

    Final Thoughts on Your Green Setup

    Final Thoughts on Your Green Setup.

    At the end of the day, adding greenery to your setup isn’t about following some interior design trend; it’s about optimizing your environment for actual output. Whether you’re choosing low-light survivors for a dim corner or air-purifying species to help clear out the mental fog during a long sprint, the goal is the same: minimizing friction. You want plants that integrate into your life without adding more maintenance tasks to your mental load. If a plant requires a complex schedule and constant attention, it’s just another piece of clutter that breaks your flow. Keep it simple, keep it functional, and make sure your greenery works for you, not against you.

    Your workspace should be a reflection of your need for focus and mobility. As someone who constantly moves between different setups, I’ve learned that the best tools—and the best decor—are the ones that feel almost invisible once they’re in place. A single, well-chosen plant can ground your desk and turn a sterile tech station into a space where you actually want to spend time. Don’t overthink the aesthetics; just find that one piece of nature that fits your minimalist workflow and lets you get back to what matters: the work itself.

    Frequently Asked Questions

    How do I keep my plants alive if I'm traveling or working from different locations for a few weeks?

    Since I’m constantly moving between cities, I can’t rely on a permanent setup. For short trips, I switch to self-watering spikes or even just a simple terracotta saucer setup to keep the moisture levels steady. If I’m gone for a few weeks, I honestly just swap my high-maintenance greenery for succulents or hardy snake plants. They don’t care if I’m offline for a bit, and they won’t die while I’m chasing better Wi-Fi.

    Are there any specific plants that won't interfere with my tech gear or cause moisture issues near my electronics?

    Look, the last thing you want is a rogue leak killing your custom mechanical keyboard or shorting out a cloud server node. Stick to succulents or cacti if you want zero moisture drama; they’re basically the “low-power mode” of the plant world. If you want something lush, go with a Sansevieria (Snake Plant). They’re hardy, don’t need constant misting, and their root systems are contained, so you can keep them near your gear without the anxiety.

    What’s the best way to integrate greenery into a minimalist setup without making the desk feel cluttered?

    Stick to the “one-in, one-out” rule. If you’re adding a plant, something else—like a bulky coaster or a stack of random cables—has to go. I prefer small, sculptural pieces like a single succulent in a matte ceramic pot or a tiny terrarium. Keep the pots uniform in color and material to match your tech. If it doesn’t serve the aesthetic or your focus, it’s just digital clutter in physical form.


  • Maintaining Cloud Computing Transparency in Remote Teams

    Maintaining Cloud Computing Transparency in Remote Teams

    I was sitting in a cramped cafe in Lisbon last month, staring at a spinning loading icon while my lo-fi playlist looped for the tenth time. I was trying to troubleshoot a client’s deployment, but I couldn’t tell if the lag was my shitty local Wi-Fi or a massive bottleneck deep within their provider’s backend. This is the problem with the current state of cloud computing transparency; most providers wrap their services in such a thick layer of “black box” mystery that when things break, you’re essentially flying blind. We’ve been sold this dream of effortless scalability, but the reality is often a frustrating guessing game of hidden latency and obscured data flows.

    I’m not here to sell you on some enterprise-grade buzzword salad or tell you that every problem has a paid subscription fix. I want to talk about how we actually build systems that don’t fail in silence. In this post, I’m going to break down how to demand better visibility from your stack so you can stop babysitting your infrastructure and start actually doing the work. No hype, no fluff—just practical ways to make your cloud tools as invisible and seamless as they were meant to be.

    Table of Contents

    Real Time Cloud Observability Seeing Through the Digital Fog

    Real Time Cloud Observability Seeing Through the Digital Fog

    Real-time Cloud Observability: Seeing Through the Digital Fog

    When I’m working from a cafe in Lisbon or a library in Berlin, I can’t afford to wonder if my deployment is actually running or if it’s just spinning its wheels in some black box. This is where real-time cloud observability becomes a non-negotiable. It’s not just about knowing that a server is “up”; it’s about having a granular view of the telemetry flowing through your stack. Without that level of detail, you’re essentially flying blind, trying to debug complex latency issues through a thick digital fog.

    The problem is that most people treat the shared responsibility model like a suggestion rather than a framework. You might think your provider has everything covered, but if you don’t have deep cloud infrastructure visibility, you’re the one who ends up staying up until 3 AM fixing a preventable outage. You need tools that provide a continuous stream of insights, turning invisible processes into actionable data. If you can’t see the heartbeat of your systems as they happen, you aren’t really in control of your workflow—you’re just hoping for the best.

    Demanding Cloud Service Provider Accountability for Seamless Flow

    Demanding Cloud Service Provider Accountability for Seamless Flow

    The problem is that most people treat their cloud setup like a “black box”—you toss your data in, pay the monthly fee, and just hope for the best. But when a latency spike hits or a service goes dark while you’re trying to push a critical update from a cafe in Lisbon, “hoping” isn’t a strategy. You need to stop treating your provider like a mysterious deity and start treating them like a vendor. This is where cloud service provider accountability becomes non-negotiable. If they aren’t giving you the granular telemetry you need to understand their uptime and performance, they’re essentially asking you to fly blind.

    It’s easy to get lost in the legal jargon of a service agreement, but you have to understand the shared responsibility model inside and out. They handle the heavy lifting of the physical hardware, sure, but you are still the one on the hook for how your architecture actually performs. You can’t claim ignorance if your workflow collapses because of a configuration error that a more transparent provider would have flagged early. True efficiency comes when you stop guessing and start demanding the level of visibility that allows you to manage your digital life without constant anxiety.

    Five Ways to Stop Guessing and Start Controlling Your Stack

    • Audit your provider’s visibility tools before you sign the contract. If they can’t show you exactly where your latency spikes are happening in real-time, they’re just selling you a black box.
    • Prioritize API-first architectures. You need to be able to pull your own data and feed it into your own monitoring tools rather than relying on a vendor’s polished, but often incomplete, dashboard.
    • Automate your compliance checks. Don’t wait for a quarterly review to realize your data has drifted into a non-compliant region; use scripts that alert you the second a configuration changes.
    • Demand granular logging. “Service is up” isn’t enough information when you’re working from a cafe in a different time zone. You need to see the granular logs that explain why a connection dropped.
    • Build for redundancy, not just uptime. Transparency means knowing exactly how your failover works. If your backup isn’t just as visible as your primary, you don’t actually have a backup.

    The Bottom Line: Building a Frictionless Stack

    Stop treating your cloud setup like a black box; if you can’t see how your data is moving in real-time, you aren’t actually in control of your workflow.

    Demand transparency from your providers from day one, because a seamless remote setup is impossible if you’re constantly fighting invisible service outages.

    Prioritize tools that act as invisible infrastructure—the best tech is the kind you forget is even there because it just works.

    ## The Illusion of the "Black Box"

    “If I can’t see exactly how my data is moving or where a latency spike is coming from, I’m not actually running a system—I’m just babysitting a black box and hoping for the best. Transparency isn’t a luxury; it’s the difference between a workflow that flows and one that constantly breaks.”

    Elias Vandermeer

    The Path to a Frictionless Future

    The Path to a Frictionless Future.

    At the end of the day, cloud transparency isn’t just some high-level technical requirement for enterprise IT departments; it’s the bedrock of a functional, modern workflow. We’ve talked about why real-time observability is non-negotiable and why we need to stop letting service providers hide behind black-box architectures. When you can actually see how your data is moving and how your resources are being allocated, you stop playing a guessing game with your productivity. Achieving this level of visibility means moving away from reactive troubleshooting and toward a system where tools are truly invisible, allowing you to focus on the actual output rather than the infrastructure holding it up.

    As I move from one temporary workspace to the next, I’ve realized that the most powerful setups aren’t the ones with the most expensive hardware, but the ones that offer the most clarity and control. We are entering an era where the boundary between “local” and “cloud” is blurring into one seamless experience. Don’t settle for a digital environment that feels like a mystery box. Demand the transparency you need to build a life that isn’t tethered to a single desk or a single provider. Build your stack to be portable, transparent, and resilient, and you’ll find that the world becomes your office.

    Frequently Asked Questions

    How do I actually measure if a provider is being transparent without getting buried in a mountain of useless logs?

    Stop digging through raw logs; that’s a rabbit hole that kills your flow. Instead, look for high-level health dashboards and automated uptime reports. You want to see latency trends and error rates visualized in real-time, not a text file of a thousand lines. If a provider can’t give you a clean, glanceable interface that shows exactly where a bottleneck is happening, they aren’t being transparent—they’re just dumping their technical debt on your desk.

    Is there a way to maintain this level of visibility when I'm bouncing between different cloud vendors and local setups?

    That’s the million-dollar question. When you’re jumping between AWS, a local NAS, or some random VPS in a cafe, visibility usually dies in the gaps. To keep it consistent, you need an abstraction layer—think agnostic monitoring tools like Grafana or Prometheus that pull data from everywhere into one dashboard. Don’t rely on vendor-specific consoles; they’re silos. Build a single pane of glass so your telemetry stays unified, no matter where the hardware actually lives.

    At what point does constant monitoring start to mess with my actual performance and latency?

    It’s a fine line. If you’re running heavy telemetry agents on every single node, you’re essentially fighting your own gear. Once that monitoring overhead starts eating into your CPU cycles or spiking your network latency, you’ve crossed from “observability” into “interference.” I’ve seen setups where the logging itself becomes the bottleneck. Keep your monitoring lightweight and asynchronous; if the tool meant to watch the work starts slowing down the work, it’s time to strip it back.

  • Benefits of Using a Docking Station With a Laptop

    Benefits of Using a Docking Station With a Laptop

    I was sitting in a cramped cafe in Lisbon last month, trying to finish a cloud migration sync, when my cheap, third-party adapter decided to quit. I spent twenty minutes wrestling with a tangled mess of dongles just to get a single monitor to recognize my signal, all while my lo-fi playlist looped in the background and my patience evaporated. It’s the same old story: people think they need a $300 enterprise-grade setup to be productive, but most laptop docking stations on the market are just overpriced plastic that adds unnecessary friction to your life. If a tool makes you stop working to fix it, it’s not a tool—it’s a liability.

    I’m not here to sell you on every shiny gadget with a high markup. Instead, I want to walk you through what actually matters for a mobile, cloud-first workflow: reliability, port density, and minimalist cable management. I’ve tested enough gear in enough different time zones to know which ones actually hold up and which ones are just hype. I’ll show you how to pick a setup that stays out of your way so you can focus on the code, not the cables.

    Table of Contents

    The Single Cable Workstation Solution for Frictionless Flow

    The Single Cable Workstation Solution for Frictionless Flow.

    When I’m setting up in a new Airbnb or a quiet corner of a library, the last thing I want to do is play Tetris with a mess of power bricks and peripherals. This is where the single cable workstation solution becomes a total game-changer for my sanity. Instead of hunting for five different plugs, I want one high-quality connection that handles everything from my external drives to my peripherals. It’s about reducing the cognitive load; when the physical friction of setting up is gone, I can actually dive into my code or system architecture without that mental lag.

    The real magic happens when you lean into docking station power delivery. There’s something incredibly satisfying about plugging in one cord and watching your laptop juice up while simultaneously driving a dual monitor laptop setup. It turns a cramped cafe table into a legitimate command center in seconds. Just make sure you’re looking closely at the specs—understanding the nuances of thunderbolt vs usb-c docking is the difference between a seamless transition and a frustrating afternoon of flickering screens and dropped connections.

    Thunderbolt vs Usb C Docking Choosing Your Invisible Engine

    Thunderbolt vs Usb C Docking Choosing Your Invisible Engine

    When you’re staring at a spec sheet, the distinction between thunderbolt vs usb-c docking can feel like unnecessary jargon, but for my workflow, it’s everything. Think of USB-C as the reliable, everyday driver—it’s great for peripherals, extra ports, and basic charging. But if you’re trying to push a high-resolution dual monitor laptop setup without the lag or flickering that ruins your focus, you need the raw bandwidth of Thunderbolt. It’s the difference between a narrow side street and a multi-lane highway; one gets you there, but the other actually lets you move at speed.

    The real deciding factor for me is how much weight you’re adding to your bag. If you just need a few extra ports for a mouse or an external drive, a compact set of multi-port laptop adapters is plenty. But if you’re building a semi-permanent home base in a new city, investing in a Thunderbolt dock provides that single cable workstation solution I live by. It handles the heavy lifting—data, video, and high-wattage power delivery—through one connection, keeping your desk minimal and your mental overhead even lower.

    Five Ways to Stop Fighting Your Hardware and Start Working

    • Prioritize Power Delivery (PD) so your dock handles the juice. There is nothing more soul-crushing than plugging in your peripherals only to realize your laptop battery is still draining because the dock isn’t actually charging it.
    • Check your port density against your real-world gear. Don’t just look at the number of USB ports; make sure you actually have enough high-speed slots for your external SSDs and that the video outputs match the refresh rates your monitors actually need.
    • Look for “set it and forget it” stability. I’ve dealt with enough cheap hubs that disconnect the second you bump the desk. If the connection isn’t rock-solid, it’s not a tool—it’s a distraction.
    • Think about your cable management from day one. A dock that’s a tangled mess of proprietary wires defeats the whole purpose of a clean, minimalist setup. Aim for a single-cable connection that keeps your workspace looking intentional.
    • Match the dock to your mobility needs. If you’re constantly moving between cafes and temporary desks, a heavy, bulky desktop dock is dead weight. You need something that feels like an extension of your laptop, not an anchor.

    The Bottom Line for Your Setup

    Don’t overspend on features you won’t use; prioritize a dock that supports your specific monitor setup and provides enough power delivery so you can ditch the bulky laptop brick for good.

    Speed matters more than you think—if you’re moving large files or running heavy cloud-based workloads, investing in Thunderbolt isn’t a luxury, it’s how you prevent your hardware from becoming a bottleneck.

    Aim for a “plug-and-play” reality; the best dock is the one you don’t have to think about, allowing you to transition from a coffee shop to a temporary desk without a mental breakdown over cable management.

    ## The Philosophy of Frictionless Gear

    “A docking station shouldn’t feel like a piece of hardware you have to manage; it should feel like an extension of your laptop that just disappears once you’re plugged in. If I’m spending more than five seconds wrestling with a connection, the setup has already failed me.”

    Elias Vandermeer

    Finding Your Flow

    Finding Your Flow with a seamless dock.

    At the end of the day, picking a docking station isn’t about collecting the most ports or chasing every spec on a datasheet. It’s about deciding how much friction you’re willing to tolerate in your daily routine. Whether you opt for the raw power of Thunderbolt to drive multiple high-res displays or stick with a streamlined USB-C setup for your lighter travel days, the goal remains the same: minimizing the gap between your idea and its execution. A solid dock turns a messy pile of peripherals into a unified, single-cable ecosystem that lets you transition from a coffee shop to a home office without missing a beat.

    Don’t let your hardware become a bottleneck for your lifestyle. I’ve spent enough time wrestling with mismatched cables and slow connections to know that a bad setup is a silent productivity killer. Invest in tools that actually serve your mobility, and prioritize setups that feel seamless and invisible. Your workspace should be an extension of your intent, not a series of obstacles you have to solve every single morning. Get the right gear, clear the clutter, and get back to the work that actually matters.

    Frequently Asked Questions

    Will this dock actually charge my laptop, or am I going to be hunting for a power brick anyway?

    That’s the biggest headache if you don’t check the specs first. You want a dock with Power Delivery (PD) that matches your laptop’s wattage requirements. If your MacBook or Dell needs 65W and the dock only puts out 15W, you’re basically just using it as a glorified USB hub while your battery drains. Always look for the “Power Delivery” rating in the fine print—that’s how you kill the power brick for good.

    How much bandwidth am I actually losing if I try to run dual 4K monitors through a single USB-C port?

    Honestly, if you’re trying to push dual 4K displays through a standard USB-C port without Thunderbolt, you’re going to hit a wall. You aren’t just losing “bandwidth”—you’re likely sacrificing data speeds for your peripherals or dropping your refresh rate to a choppy 30Hz. It’s a massive bottleneck. Unless you’re using a high-end Thunderbolt 4 dock, you’re basically forcing your setup to choose between visual clarity and actual usability. Don’t compromise your flow.

    Is it worth investing in a high-end Thunderbolt dock if my current laptop only supports standard USB-C?

    Honestly? Not yet. If your current machine doesn’t have the bandwidth to handle Thunderbolt, a high-end dock is basically just an expensive USB-C hub. You’ll be paying for lanes and speeds you literally cannot access. Save your cash for now. My advice: grab a solid, reliable USB-C dock that handles your current peripherals perfectly. Once you upgrade to a laptop that actually supports Thunderbolt, then you can make the leap to a high-end setup.

  • Optimizing Your External Monitor Setup

    Optimizing Your External Monitor Setup

    I was sitting in a cramped cafe in Lisbon last month, staring at a massive, 32-inch curved display that some “productivity guru” insisted was the holy grail of efficiency. It was beautiful, sure, but it was also completely useless because it was bolted to a desk in a room I’d never visit again. Most advice regarding an external monitor setup assumes you have a permanent office with a dedicated power grid and a custom-built desk. That’s a lie. If your gear is too heavy to throw in a backpack or too complex to deploy in under five minutes, it’s not an asset—it’s digital baggage that’s just holding you back from actually working.

    I’m not here to sell you on the most expensive ultrawide on the market or a setup that requires a degree in electrical engineering to plug in. Instead, I’m going to show you how to build a lean, mobile, and cloud-integrated workspace that actually scales with your life. We’re going to focus on high-performance gear that prioritizes portability and seamless connectivity, ensuring your workflow stays uninterrupted no matter where you happen to be logging in from.

    Table of Contents

    Mastering the Ultrawide Monitor Benefits for Fluidity

    Mastering the Ultrawide Monitor Benefits for Fluidity

    If you’ve ever felt the mental friction of clicking between windows on a single laptop screen, an ultrawide is the immediate fix. For me, the real ultrawide monitor benefits aren’t just about having more “space”; it’s about the psychological flow. Instead of the visual stutter of a traditional dual monitor configuration—where you’re constantly fighting that plastic bezel in the middle—an ultrawide gives you a single, continuous canvas. I can keep my terminal, my IDE, and a documentation tab open side-by-side without ever breaking my stride.

    When I’m working out of a temporary spot, I prioritize a setup that minimizes clutter. Using an ultrawide paired with USB-C docking stations is a game changer for my mobility. It allows me to push video, data, and power through a single cable, keeping my desk looking clean and intentional. You don’t need a massive, sprawling desk to feel powerful; you just need a screen that lets you see your entire workflow at once without the constant context switching that kills your focus.

    Usb C Docking Stations Tools That Simply Vanish

    Usb C Docking Stations Tools That Simply Vanish

    If you’re still fumbling with a dozen different dongles every time you sit down at a new spot, you’re doing it wrong. For me, the goal is always a single-cable connection. High-quality USB-C docking stations are the unsung heroes of a mobile workflow; they act as the central nervous system for your gear. When I land in a new city, I want to plug one cable into my laptop and instantly have my peripherals, high-speed storage, and displays live. It turns a chaotic mess of wires into a seamless extension of my machine.

    Beyond just convenience, a solid dock is essential for maintaining a clean, ergonomic workstation layout. Instead of having cables snaking across your desk like a digital jungle, everything stays tucked away and organized. This isn’t just about aesthetics, though—it’s about stability. A dedicated dock handles the heavy lifting of power delivery and data throughput, ensuring that your refresh rate and resolution optimization stay consistent, even when you’re pushing a demanding dual monitor configuration. If the hardware feels invisible, you’ve done it right.

    Five Ways to Keep Your Setup Lean and Functional

    • Prioritize single-cable connectivity. If your monitor doesn’t support power delivery via USB-C, you’re carrying too many bricks; look for a display that can charge your laptop and carry your data through one cord.
    • Invest in a high-quality, portable monitor as a secondary screen. A 15-inch OLED panel that slides into your tech bag is a game-changer when you’re trying to turn a cramped cafe table into a dual-screen workstation.
    • Get a heavy-duty monitor arm instead of using the stock stand. Most factory bases take up way too much desk real estate, and freeing up that space underneath makes a minimalist setup feel much more intentional.
    • Match your refresh rates. There’s nothing more distracting than a smooth laptop screen paired with a stuttering external display; keep your hardware specs in sync so your eyes don’t have to constantly adjust to the lag.
    • Optimize your cable management from the jump. Use braided sleeves or even just simple velcro ties to tuck everything away; if your workspace looks like a bird’s nest of wires, you’ve already lost the mental clarity needed to focus.

    The Mobile Setup Checklist

    Prioritize single-cable connectivity via USB-C or Thunderbolt; if you’re fumbling with five different dongles every time you move to a new cafe, your setup has already failed you.

    Opt for high-resolution portability over raw screen real estate; an ultrawide is great for the home base, but a high-density portable monitor is what actually keeps your workflow fluid when you’re on the road.

    Build for redundancy by ensuring your cloud-based tools and local hardware are perfectly synced, so a hardware hiccup never turns into a full-blown productivity blackout.

    ## The Tether Trap

    A monitor shouldn’t be an anchor that pins you to a single corner of a room; it should be a seamless extension of your digital workspace that stays out of your way until you actually need the screen real estate.

    Elias Vandermeer

    The Mobile Command Center

    The Mobile Command Center monitor setup.

    At the end of the day, building the right external monitor setup isn’t about collecting the most expensive gear on the market; it’s about eliminating friction. Whether you’re leaning into the massive screen real estate of an ultrawide to keep your cloud environments visible at a glance, or relying on a streamlined USB-C docking station to keep your cables from becoming a chaotic mess, every choice should serve one purpose: focus. If your hardware requires a PhD to troubleshoot or anchors you to a single corner of a room, it’s failing you. The goal is to create a seamless digital ecosystem that feels as natural as the keyboard under your fingers.

    Stop thinking of your workspace as a fixed location and start seeing it as a portable state of mind. Your setup should be an extension of your workflow, something that adapts to the cafe in Berlin or the small apartment in Tokyo just as easily as your home base. When you invest in tools that are truly mobile and cloud-integrated, you aren’t just buying monitors and docks—you’re buying the freedom to work from anywhere without compromising your professional standard. Build a setup that moves with you, and you’ll realize that the world is much bigger than a cubicle.

    Frequently Asked Questions

    How do I manage cable clutter when I'm switching between a permanent desk and a temporary mobile setup?

    The trick is to stop thinking in terms of “plugging things in” and start thinking about a single point of failure—in a good way. I use a high-bandwidth USB-C or Thunderbolt dock as my anchor. Everything—my keyboard, external drive, and monitor—plugs into the dock at my desk. When I need to move, I just unplug one single cable from my laptop. It turns a chaotic mess of wires into a one-second transition.

    Is it worth investing in a portable monitor, or should I just stick to a single high-quality ultrawide?

    It really depends on where you’re actually doing your work. If you’ve found a solid home base or a consistent co-working spot, a high-quality ultrawide is unbeatable for sheer screen real estate and focus. But if you’re like me—bouncing between cafes or testing cloud latency in different cities—that ultrawide becomes a massive anchor. For true mobility, a portable monitor is worth every penny. It keeps your workflow seamless without tethering you to a single desk.

    What's the best way to ensure my laptop doesn't overheat when it's hooked up to a high-resolution external display?

    Driving a high-res display puts a massive load on your GPU, which is a recipe for thermal throttling. First, ditch the laptop bag or sleeve while you’re working; they trap heat like an oven. I always use a minimalist, ventilated stand to get some airflow under the chassis. If you’re really pushing pixels, consider a Thunderbolt dock to offload some of that connection stress, and keep your ambient lo-fi playing—it helps me stay calm even when my fans ramp up.

  • Protecting Your Eyes From Blue Light Exposure

    Protecting Your Eyes From Blue Light Exposure

    I was sitting in a cramped cafe in Lisbon last month, trying to debug a client’s cloud deployment while my lo-fi playlist fought against the screeching espresso machine. By hour four, my head felt like it was being squeezed in a vice, and my eyes were burning from staring at a high-brightness terminal. I realized then that I’d been ignoring the obvious: I had zero real blue light protection in my mobile setup. Most people will try to sell you $150 designer glasses that do nothing but tint your world a weird yellow, but honestly, that’s just expensive clutter you don’t need.

    I’m not here to peddle overpriced eyewear or tell you to stare at a wall for an hour every night. Instead, I want to show you how to integrate actual, seamless blue light protection into your digital workflow without sacrificing your color accuracy or your portability. We’re going to talk about software tweaks, smart hardware adjustments, and the minimal gear that actually works. My goal is to help you keep your tools invisible and seamless so you can stop fighting your hardware and get back to the work that actually matters.

    Table of Contents

    Digital Eye Strain Prevention Without the Clutter

    Digital Eye Strain Prevention Without the Clutter

    When you’re working from a cafe or a tiny Airbnb, your setup is usually minimal, which means you don’t have room for bulky, specialized hardware. I try to keep my gear lean, so I focus on software-side fixes first. Using “Night Shift” or similar OS-level color temperature adjustments is the easiest way to handle digital eye strain prevention without adding another physical object to my bag. It’s a subtle shift, but it keeps the screen from feeling like a flashlight hitting your retinas during a late-night deployment.

    If software isn’t cutting it, I lean toward high-quality blue light blocking glasses. I’m picky about this; they can’t be heavy or look ridiculous, because if they’re uncomfortable, I’m not wearing them. The real win here isn’t just about immediate comfort, though—it’s about preventing circadian rhythm disruption. If I’m staring at high-intensity light at 2 AM, my brain thinks it’s noon, and that completely wrecks my sleep cycle. Keeping the light spectrum manageable helps me transition from “deep work mode” to actual rest much more smoothly.

    Reducing Screen Glare for Uninterrupted Focus

    Reducing Screen Glare for Uninterrupted Focus

    Glare is the ultimate flow-killer. There’s nothing worse than trying to debug a cloud configuration in a bright cafe only to realize your screen is basically a mirror for the window behind you. When you’re constantly squinting to see past reflections, you aren’t just losing focus; you’re inviting computer vision syndrome relief needs into your daily routine. I’ve learned the hard way that if your environment isn’t controlled, your eyes will pay the price.

    I try to keep my kit minimal, so I don’t carry heavy privacy screens everywhere, but I am obsessive about reducing screen glare through positioning. If I’m working from a new spot, the first thing I do is adjust my angle to avoid direct light hitting the panel. If that fails, I lean on a matte screen protector or adjust my brightness levels to match the ambient light. It sounds like a small tweak, but it’s a massive part of digital eye strain prevention. Keeping that visual input clean ensures the tools stay invisible, letting me actually stay in the zone instead of fighting my hardware.

    My Low-Friction Approach to Protecting Your Eyes

    • Stop relying on those cheap, yellow-tinted software filters that mess with your color accuracy; if you’re doing any real design or system work, invest in a high-quality pair of dedicated blue light glasses that actually let you see the screen clearly.
    • Automate your OS settings so your “Night Shift” or “Night Light” kicks in exactly when the sun goes down—you shouldn’t have to manually fiddle with settings just to keep your circadian rhythm on track.
    • Use a matte screen protector if you’re working in cafes or spots with unpredictable lighting; it kills the glare that forces you to squint and lean in closer to your monitor.
    • Follow the 20-20-20 rule religiously—every 20 minutes, look at something 20 feet away for 20 seconds—it’s a tiny habit, but it prevents that heavy, “sand in the eyes” feeling at the end of a long session.
    • Optimize your workspace brightness to match your environment; if your screen is a glowing lighthouse in a dim room, you’re begging for eye fatigue, so keep the ambient light levels balanced.

    The Bottom Line for Your Setup

    Prioritize software-based blue light filters or high-quality eyewear over bulky physical screen shields to keep your workspace minimalist and portable.

    Manage your environment by controlling glare—whether through matte screen protectors or better lighting—so you aren’t fighting your hardware to see your work.

    Treat eye care as a tool for focus; if you’re constantly squinting or rubbing your eyes, your setup is failing you and breaking your flow.

    ## Protecting the Flow

    “Blue light protection isn’t about adding more gear to your desk; it’s about removing the friction between your eyes and your screen so you can actually stay in the zone.”

    Elias Vandermeer

    Protecting Your Most Important Hardware

    Protecting Your Most Important Hardware.

    At the end of the day, managing blue light isn’t about adding more gear to your bag; it’s about making sure your environment doesn’t fight against your biology. Whether you’re adjusting your software settings to kill the harshness of a midnight coding session or setting up a matte screen protector to dodge glare in a sunlit cafe, the goal is the same: minimizing friction. By implementing these small, low-profile adjustments—like software filters and better lighting—you ensure that your digital tools remain invisible. You want to be thinking about your cloud architecture or your latest integration project, not about how much your eyes are throbbing by 3:00 PM. Keep your setup lean and intentional so you can stay in the zone longer.

    We spend so much time optimizing our CPUs, our bandwidth, and our cloud latency, but we often forget that our own eyes are the primary interface for everything we do. If your physical hardware—your vision—fails, the most sophisticated remote setup in the world becomes useless. Don’t let preventable eye strain become the bottleneck in your career. Treat your focus like the precious resource it is and build a workflow that supports your longevity. Remember, a truly professional setup isn’t just about what’s on your desk; it’s about sustaining your ability to perform anywhere the world takes you.

    Frequently Asked Questions

    Are blue light glasses actually worth the investment, or is software like Night Shift enough for a minimal setup?

    Honestly, it depends on your setup. If you’re working purely on a laptop in a controlled environment, software like Night Shift or f.lux is usually enough to take the edge off. But if you’re bouncing between cafes or working under harsh overhead lights, a decent pair of blue light glasses can be a game changer. They add a physical layer of protection that software just can’t touch, helping keep your focus steady when the environment isn’t cooperating.

    How do I balance using blue light filters without totally ruining the color accuracy I need for my work?

    That’s the real struggle. If you crank the “Night Shift” slider to the max, everything looks like a muddy sunset, which is useless if you’re tweaking UI or checking color-sensitive docs. My move? Use software-based filters like f.lux or your OS settings, but keep them on a low, gradual curve. Better yet, invest in a decent pair of blue-light-blocking glasses. They protect your eyes without messing with your monitor’s actual color profile.

    Can specific lighting setups in my workspace help reduce eye strain even if I'm not wearing glasses?

    Absolutely. You don’t need blue light glasses to fix a bad environment. If you’re working in a dark room with a bright monitor, you’re fighting a losing battle against contrast. I always aim for balanced, indirect ambient lighting—think a warm LED strip behind my desk or a well-placed floor lamp. It softens the edge between your screen and the room, stops that harsh glare, and keeps your eyes from working overtime just to focus.

  • Optimizing Natural Light in a Home Office

    Optimizing Natural Light in a Home Office

    I spent three months working out of a basement studio in Berlin last year, and I can tell you right now: no amount of high-end, color-accurate studio lamps can fix a workspace that’s fundamentally disconnected from the sun. People love to obsess over expensive monitor hoods and specialized task lighting, but they completely ignore the most basic element of a productive environment. If you aren’t optimizing your natural lighting office setup, you’re basically fighting a losing battle against your own circadian rhythm. I’ve seen too many “pro” setups that look great in a static photo but feel completely soul-crushing once you actually try to sit down for an eight-hour deep work session.

    I’m not here to sell you on some aesthetic lifestyle trend or tell you to go buy a thousand-dollar smart bulb system. I want to show you how to actually use the light you already have to reduce eye strain and keep your focus sharp, even when you’re jumping between different temporary setups. I’ll be sharing the practical, low-maintenance tactics I use to manage glare and light shifts without cluttering my desk or breaking my workflow. Let’s get into the actual mechanics of making light work for you, not against you.

    Table of Contents

    Reducing Screen Glare for Invisible Seamless Focus

    Reducing Screen Glare for Invisible Seamless Focus

    The biggest killer of deep work isn’t a bad connection; it’s that blinding white patch of light bouncing off your monitor right when you’re mid-flow. If you’re sitting perpendicular to a window, you’re basically asking for a headache. I’ve spent too many afternoons in cafes trying to tilt my laptop at a ridiculous angle just to see my code. Instead of fighting the environment, try reducing screen glare by using sheer linen curtains or smart blinds. They diffuse the light, turning a harsh glare into a soft, even glow that keeps your eyes from straining.

    I’m a big believer in indoor lighting ergonomics, which means your setup should work with the sun, not against it. If you can’t move your desk, look into matte screen protectors or high-quality anti-glare films. It sounds like a small fix, but when you’re trying to disappear into a complex cloud deployment, you need your tools to be invisible. You shouldn’t be thinking about the light hitting your eyes; you should only be thinking about the work in front of you.

    Daylight Harvesting Techniques for a Mobile First Mindset

    Daylight Harvesting Techniques for a Mobile First Mindset

    Since I’m constantly moving between different Airbnbs and co-working spaces, I can’t exactly control the architecture of the building. I have to make the light work for me on the fly. This is where daylight harvesting techniques become a necessity rather than a luxury. Instead of just sitting wherever the desk is, I scout for spots where the sun provides consistent, indirect illumination. I look for north-facing windows or areas where light bounces off a neutral wall; this gives me that steady brightness without the harsh, direct heat that kills a laptop’s performance.

    If I’m stuck in a spot with aggressive, direct sun, I lean into a bit of biophilic office design by using lightweight, portable sheer curtains or even just repositioning my setup to catch the peripheral glow. The goal is to maximize natural light productivity without the headache of constant squinting. It’s about creating a flow where the environment supports your rhythm. If you can manage your light exposure effectively, you aren’t just working in a room—you’re optimizing your entire sensory input for deep, uninterrupted focus.

    5 ways to make light work for you, not against you

    • Position your desk perpendicular to the window. If you face the light directly, you’ll deal with eye strain; if your back is to it, you’re staring at a glare-filled nightmare. Side-lighting is the sweet spot for staying focused.
    • Invest in sheer linen or light-filtering blinds. You want to diffuse that harsh, direct midday sun into a soft, even glow that fills the room without washing out your screen.
    • Use the “Golden Hour” rule for your deep work sessions. If your setup is near a window, time your most intensive coding or integration tasks for when the light is soft and indirect to avoid the midday headache.
    • Don’t ignore the shadows. If you’re working in a corner, use a small, warm-toned task lamp to fill in the dark spots created by natural light. A high-contrast environment is a distraction; you want a seamless transition from window light to desk light.
    • Mirror your light sources. If you’re in a cramped rental or a small cafe, use a small mirror strategically placed to bounce natural light into the darker corners of your workspace, making the whole area feel more open and less claustrophobic.

    The takeaway: Making light work for you

    Stop treating light as a distraction; position your setup so natural illumination supports your focus instead of fighting your screens.

    Prioritize portability by choosing lighting solutions that adapt to whatever mediocre desk or window you find yourself working next to.

    Aim for seamless integration—the best lighting is the kind you don’t even notice because it’s working perfectly in the background.

    The invisible variable

    “If you’re fighting a glare on your monitor or squinting through a dim room, you aren’t working; you’re just managing your environment. Good lighting should be like a clean cable management job—you shouldn’t even notice it’s there, it just lets you stay in the flow.”

    Elias Vandermeer

    The Invisible Advantage

    Optimizing workspace light: The Invisible Advantage.

    At the end of the day, optimizing your workspace for natural light isn’t about chasing an aesthetic for Instagram; it’s about eliminating friction. We’ve looked at how managing glare keeps your focus sharp and how harvesting daylight allows you to maintain a high-level workflow without being tethered to a specific corner of a room. When you treat light as just another component of your tech stack—something to be managed and integrated rather than fought—you create an environment that actually supports your cognitive load. A setup that respects your circadian rhythm and minimizes eye strain is a setup that lets you actually do the work instead of just managing your discomfort.

    My philosophy has always been that your tools should be invisible, and your environment should be no different. If you’re constantly squinting at a screen or feeling drained by harsh, artificial overheads, your setup is failing you. Stop settling for static, poorly lit spaces that force you to adapt to them. Instead, build a mobile-first, light-aware workflow that moves with you. Whether you’re in a quiet cafe or a temporary rental, prioritize that connection to the outside world. When you master your environment, you finally gain the freedom to master your craft.

    Frequently Asked Questions

    How do I manage natural light in a small rental or temporary space without being able to swap out the windows?

    Since you can’t swap the windows, stop trying to fight the architecture and start layering your control. I always lean on high-quality, tension-rod blackout curtains or even temporary, static-cling window films if I’m in a short-term rental. They’re non-destructive and easy to pack when I move. If the glare is still killing your focus, grab a simple monitor hood or adjust your desk angle to intercept the light before it hits your screen.

    What are the best portable tools or window treatments to stop harsh afternoon sun from killing my focus?

    If you’re moving around as much as I am, you can’t rely on built-in blinds. I always pack a set of lightweight, suction-cup blackout shades or even just high-quality linen cafe curtains if I’m staying somewhere longer. They’re easy to toss in a tech bag and kill that harsh glare instantly. Honestly, if you’re stuck in a spot with zero control, a simple, foldable laptop sunshade is a lifesaver for maintaining focus.

    Is it possible to balance natural light with my screen setup if I'm working in a location with unpredictable weather?

    It’s definitely possible, but you have to stop relying on static setups. When the weather turns gray or the sun suddenly peaks through, your environment shifts. I always keep a high-quality, dimmable monitor light bar in my kit. It bridges the gap when natural light fails, maintaining consistent contrast without the eye strain. Think of it as your manual override—it keeps your workspace stable even when the sky isn’t.

  • Reducing Wrist Strain With a Vertical Mouse

    Reducing Wrist Strain With a Vertical Mouse

    I was sitting in a cramped cafe in Porto last month, trying to push through a complex cloud migration script, when that familiar, dull ache started creeping up my forearm. It’s that specific, biting tension that tells you your gear is working against you, not for you. I used to think I could just power through the discomfort with a standard mouse, but that’s a lie we tell ourselves to avoid changing our habits. Switching to a vertical mouse wasn’t about following some ergonomic trend or buying more plastic junk; it was about removing a physical barrier between my brain and my code.

    I’m not here to sell you on some overpriced, RGB-lit gaming peripheral that promises to change your life. Instead, I want to talk about how a proper vertical mouse actually integrates into a mobile, high-performance workflow. I’ll be sharing my honest, field-tested take on what matters—like grip stability and portablity—so you can stop managing pain and start focusing on the work. No hype, just the practical reality of making your tools invisible.

    Table of Contents

    Achieving a Neutral Wrist Position Anywhere

    Achieving a Neutral Wrist Position Anywhere.

    The real problem with a standard mouse is the “pronated” position—that awkward, flat-on-the-table way your hand sits that forces your forearm bones to cross over each other. When I’m working out of a cramped cafe in Lisbon or a tiny Airbnb in Montenegro, I notice my wrist starts aching after just an hour of tweaking cloud configurations. That’s because you aren’t in a neutral wrist position; you’re essentially twisting your anatomy to fit the hardware. Switching to a vertical design lets your hand settle into a natural “handshake” grip, which is the gold standard for hand posture ergonomics.

    By letting your hand rest at that natural angle, you’re doing more than just getting comfortable; you’re actively reducing forearm muscle tension that builds up during long sessions. I’ve found that once I stop fighting my own anatomy, the physical distractions just… disappear. It’s about preventing repetitive strain injury before it actually becomes a problem that forces you to take a week off. If your gear is making you focus on your pain instead of your code, your setup is failing you.

    Seamless Ergonomic Computer Peripherals for Digital Nomads

    Seamless Ergonomic Computer Peripherals for Digital Nomads

    When you’re working out of a cafe in Lisbon or a cramped Airbnb in Chiang Mai, your gear needs to be more than just functional; it needs to be protective. Most standard mice force your palm flat against the desk, which is a recipe for disaster when you’re pulling long hours on a deadline. I’ve found that investing in high-quality ergonomic computer peripherals is the only way to stay mobile without paying for it later in physical pain. It’s about finding that balance between a slim profile that fits in my tech pouch and a shape that actually respects my anatomy.

    If you’re serious about a long-term freelance career, you have to prioritize preventing repetitive strain injury before the tingling in your fingers even starts. I don’t have the luxury of a permanent, custom-built workstation, so I rely on tools that promote a neutral wrist position regardless of whether I’m on a wooden bistro table or a hotel desk. It’s not about being high-maintenance; it’s about ensuring my setup doesn’t become a bottleneck to my actual work.

    Five Ways to Actually Make a Vertical Mouse Work for You

    • Don’t expect instant magic; your muscle memory is going to fight you for the first few days, so give it a week before you decide it’s a gimmick.
    • Pair it with a portable mousepad because trying to use a vertical mouse on a coffee shop table or a bedsheet is a recipe for jittery tracking and frustration.
    • Keep your forearm relaxed, not just your wrist; the whole point is to stop that “claw” tension, so let your arm settle into a natural handshake position.
    • Check your DPI settings immediately, since the different grip angle usually means you’ll need to adjust how much you move your hand to get across the screen.
    • Match your mouse size to your hand scale; if you’re traveling light, don’t grab a massive ergonomic brick that feels like a workout just to move a cursor.

    The Bottom Line for Your Mobile Setup

    Stop treating ergonomics as an afterthought; a vertical mouse isn’t a luxury, it’s a necessity if you want to keep working without constant wrist fatigue.

    Prioritize gear that fits your lifestyle, meaning your mouse needs to be as portable and reliable as the cloud tools you use every day.

    The goal is to make your hardware invisible so you can stop worrying about your physical discomfort and actually get into a flow state.

    The Invisible Upgrade

    “If you’re spending half your workday thinking about wrist strain or adjusting your grip, your gear is failing you. A vertical mouse isn’t some niche ergonomic luxury; it’s about making the hardware disappear so you can actually stay in the flow.”

    Elias Vandermeer

    The Final Setup Check

    The Final Setup Check for ergonomic workflow.

    At the end of the day, switching to a vertical mouse isn’t about chasing some niche ergonomic trend; it’s about removing a physical barrier between you and your work. We’ve talked about how it fixes your wrist alignment, how it fits into a minimalist mobile kit, and why it’s a non-negotiable for anyone spending ten hours a day navigating cloud interfaces. If you’re constantly managing numbing wrist pain or repetitive strain, you aren’t actually working—you’re just managing a physical limitation. Investing in the right peripheral means you can stop thinking about your hardware and start focusing on the actual output.

    My philosophy has always been that your gear should be invisible. When your tools work exactly how your body expects them to, they disappear, leaving you with nothing but a clear headspace and a seamless workflow. Don’t let a sub-par setup dictate where you can work or how long you can stay productive. Whether you’re sitting in a quiet cafe in Lisbon or a cramped corner of a library, make sure your kit is working for you, not against you. Build a setup that scales with your life, and the rest will follow.

    Frequently Asked Questions

    Will switching to a vertical mouse mess with my muscle memory and slow down my workflow while I'm learning?

    Look, I’ll be real: there’s a learning curve. For the first few days, your precision might feel a bit off, and you’ll probably find yourself reaching for the “old” way out of habit. It’s a temporary friction. But once that muscle memory resets, you won’t even notice the mouse is there. That’s the goal—the gear should become invisible so you can just stay in the flow. Stick with it; the payoff is worth the hiccup.

    Are there any lightweight vertical mice that won't take up too much space in my tech pouch when I'm traveling?

    Honestly, the struggle is real. Most vertical mice are absolute bricks, which is a nightmare when you’re trying to keep your tech pouch slim. If you’re traveling, look into the Logitech Lift—it’s designed for smaller hands and is way more compact than the MX Vertical. Alternatively, check out some of the smaller ergonomic clones on Amazon. Just make sure they aren’t so bulky that they force your bag to bulge. Keep it light, keep it mobile.

    Can I actually use a vertical mouse effectively on a plane tray table or a cramped cafe desk?

    Honestly, it’s a struggle at first. If you’re working off a cramped cafe table or a tiny plane tray, a bulky vertical mouse can feel like an anchor. But here’s the trick: look for a “compact” or “travel” vertical model rather than the massive ergonomic ones meant for a home desk. It takes a few days to recalibrate your muscle memory, but once you do, you won’t go back to that awkward claw grip.

  • The Impact of Cloud Computing Sustainability on Remote Work

    The Impact of Cloud Computing Sustainability on Remote Work

    I was sitting in a cramped cafe in Lisbon last month, staring at my laptop while a lo-fi track looped in my headphones, trying to optimize a client’s server architecture. I realized then how much we lie to ourselves about the “cleanliness” of the digital world. Everyone talks about the cloud as this ethereal, weightless thing, but the truth is that cloud computing sustainability is actually a massive, physical footprint of humming data centers and staggering energy demands. We’ve been sold this myth that moving to the cloud is an automatic win for the planet, but if you’re just migrating messy, inefficient legacy processes into a virtual environment, you’re not solving anything—you’re just outsourcing the waste.

    I’m not here to give you a lecture on corporate ESG reports or high-level fluff that sounds good in a boardroom. Instead, I want to show you how to build a stack that actually respects the resources it consumes. I’ll be sharing the practical, no-nonsense ways to audit your digital footprint and choose providers that prioritize efficiency over sheer scale. My goal is to help you build a workflow that is as lean and sustainable as it is portable.

    Table of Contents

    Why Unoptimized Cloud Resource Optimization Limits Your Freedom

    Why Unoptimized Cloud Resource Optimization Limits Your Freedom

    When I’m working from a cafe in a city I can barely pronounce, my goal is to stay lean. But the reality is that most people are doing the exact opposite with their digital footprint. If you’re leaving idle instances running or over-provisioning storage you don’t even use, you aren’t just wasting money—you’re tethering yourself to an inefficient system. Poor cloud resource optimization is essentially digital clutter. It creates this massive, invisible drag on your productivity and, more importantly, it scales your environmental impact unnecessarily.

    Every time an unoptimized server spins up just to sit there doing nothing, it contributes to the massive carbon footprint of data centers globally. For me, being a digital nomad is all about mobility and lightness. If my tech stack is bloated and inefficient, I’m not actually “free”; I’m just managing a mess that consumes more power than it needs to. We need to treat our cloud architecture like a well-managed desk setup: if a tool isn’t serving a direct purpose, it shouldn’t be taking up space or drawing power.

    The Hidden Weight of Inefficient Stationary Infrastructure

    The Hidden Weight of Inefficient Stationary Infrastructure.

    When I was still grinding through my IT degree, I used to think of “the cloud” as this weightless, ethereal thing. It’s not. Every bit of data I sync while sitting in a cafe in Lisbon is physically sitting on a spinning disk or a flash chip somewhere, pulling power. The reality is that inefficient, stationary infrastructure creates a massive drag on your ability to scale. If you’re tethered to legacy setups or running bloated, unoptimized instances, you aren’t just wasting money—you’re contributing to the massive carbon footprint of data centers that power our digital lives.

    It’s easy to ignore the physical cost of our digital nomad lifestyle, but the math doesn’t lie. When we rely on old-school, power-hungry server models, we’re essentially carrying dead weight in our digital backpacks. Moving toward sustainable IT operations isn’t just about being “eco-friendly” for the sake of a PR statement; it’s about efficiency. If your infrastructure is clunky and energy-intensive, it’s fundamentally broken. True digital freedom requires a lean, green setup that prioritizes renewable energy in cloud infrastructure so your workflow stays light, regardless of where in the world you land.

    Five Ways to Lighten Your Digital Footprint Without Killing Your Workflow

    • Stop paying for ghost resources. If you’ve got instances running that aren’t actually doing anything, you’re just burning electricity for no reason. Set up automated shutdown schedules for your dev environments so they aren’t idling away while you’re asleep or traveling.
    • Choose your regions with intention. It’s easy to just pick the closest data center, but some regions are powered by much cleaner energy grids than others. If your latency allows for it, shifting your workloads to a greener region is one of the easiest wins for sustainability.
    • Embrace serverless whenever the architecture makes sense. Instead of keeping a massive server running 24/7 just to handle occasional spikes, use serverless functions. It’s more efficient because the cloud provider only spins up the exact amount of compute you need, exactly when you need it.
    • Clean up your storage bloat. We all have those old snapshots, unused volumes, and massive log files sitting in S3 buckets like digital junk. Automate your lifecycle policies to move old data to cold storage or just delete it. If you don’t need it, don’t let it rot in a data center.
    • Optimize your code for efficiency, not just speed. It sounds nerdy, but highly optimized, lightweight code requires fewer CPU cycles to execute. Fewer cycles mean less power draw across the board. When your scripts run lean, your entire cloud footprint shrinks with them.

    The Bottom Line for a Leaner Workflow

    Sustainability isn’t just a corporate buzzword; it’s about trimming the digital fat so your tools stay fast, portable, and cost-effective.

    If your cloud architecture is bloated and unoptimized, you’re essentially carrying around dead weight that kills both your productivity and the planet.

    True professional freedom comes from choosing cloud setups that are as efficient as they are invisible, allowing you to work from anywhere without the environmental or technical overhead.

    ## The True Cost of Digital Bloat

    “We talk about the cloud like it’s this weightless, ethereal thing, but every unoptimized server and every redundant data cycle has a physical footprint. If your digital setup isn’t lean and efficient, you aren’t just wasting bandwidth—you’re dragging around a massive, invisible anchor that goes against everything a truly mobile workflow should stand for.”

    Elias Vandermeer

    The Path Forward

    The Path Forward to efficient digital workflows.

    At the end of the day, making your digital workflow sustainable isn’t just about checking a box for some corporate ESG report; it’s about intentionality. We’ve looked at how bloated, unoptimized resources act like digital dead weight, tethering you to inefficient habits and massive energy drains. By prioritizing lean cloud architectures and smarter resource allocation, you aren’t just saving money or reducing your carbon footprint—you are actively stripping away the friction that slows down your actual work. A clean, efficient cloud setup is the ultimate expression of a minimalist, high-performance lifestyle.

    I’ve learned through a lot of late nights in different time zones that the best tools are the ones you don’t even notice. Sustainability in the cloud should feel exactly like that: seamless, quiet, and incredibly efficient. As you build out your own remote setup, I challenge you to stop settling for “good enough” infrastructure that wastes energy and time. Aim for a system that is as mobile and agile as you are. When you finally align your tech stack with your values, you’ll realize that true digital freedom is only possible when your footprint is as light as your gear.

    Frequently Asked Questions

    How much of an actual impact does my personal choice of cloud provider make compared to the massive data centers?

    Look, I get it. It feels like a drop in the ocean compared to the massive, power-hungry data centers owned by the giants. But it’s not a zero-sum game. When you pick a provider with better carbon-aware scheduling or more efficient cooling, you’re essentially voting with your compute cycles. Think of it like choosing a lightweight, efficient OS for your setup—your individual configuration dictates how much “drag” you’re adding to the global grid.

    Can I actually maintain a high-performance, low-latency workflow if I'm constantly optimizing for energy efficiency?

    Honestly? If you’re doing it right, you shouldn’t even notice the difference. The goal isn’t to throttle your CPU to save a few watts; it’s about killing the bloat. When I optimize my cloud instances, I’m cutting out the “zombie” resources that just sit there idling and sucking up power. Streamlining your stack actually reduces latency because you’re stripping away the digital noise. Efficiency isn’t a compromise—it’s just a cleaner, faster way to work.

    Are there specific, lightweight cloud tools that help me stay mobile without the massive overhead of traditional enterprise setups?

    Honestly, ditch the enterprise bloat. If you’re trying to stay mobile, you need tools that live in the browser or via lightweight CLI. I lean heavily on Vercel or Netlify for deployment—they handle the heavy lifting so I don’t have to manage servers while sitting in a cafe. For dev environments, GitHub Codespaces is a lifesaver; it turns any mediocre laptop into a powerhouse. Keep it lean, keep it cloud-native, and stay unchained.

  • Benefits of Using a Wireless Mouse

    Benefits of Using a Wireless Mouse

    I was sitting in a cramped cafe in Lisbon last month, trying to debug a cloud configuration on a spotty Wi-Fi connection, when my “high-end” peripherals decided to fail me. I’d spent way too much money on a gaming-centric wireless mouse that promised millisecond response times, but in reality, it was just a heavy, over-engineered brick that died after three hours of use. Most people think you need a $150 piece of tech with a dozen programmable buttons to be “professional,” but that’s just marketing noise. If your gear is constantly demanding a recharge or adding unnecessary bulk to your tech pouch, it isn’t helping you work—it’s just another thing you have to manage.

    I’m not here to sell you on the latest RGB-lit gimmick or tell you that more buttons equals more productivity. My goal is to help you find a wireless mouse that actually vanishes into your workflow, whether you’re at a minimalist desk setup or a tiny bistro table. I’ll be sharing what actually works when you’re living out of a backpack, focusing on battery reliability, sensor precision, and true portability. No hype, just the practical setups that actually let me focus on the code.

    Table of Contents

    Bluetooth Connectivity Options Cutting the Cord Permanently

    Bluetooth Connectivity Options Cutting the Cord Permanently

    When you’re working from a cafe in Lisbon or a cramped Airbnb in Berlin, the last thing you want is a dongle sticking out of your laptop. This is where exploring different bluetooth connectivity options becomes a game changer for my workflow. Pure Bluetooth is great because it keeps your USB ports free for external drives or extra monitors, but there’s always a slight trade-off. If you’re doing heavy-duty design work or anything where precision is non-negotiable, you might notice a tiny bit of lag compared to a dedicated 2.4GHz receiver.

    For my daily driver, I usually look for a hybrid approach. I want something that can switch between a lightning-fast connection for focused deep-work sessions and a standard Bluetooth mode for when I’m just browsing or traveling light. It’s also worth considering how this affects your power management; I’ve learned the hard way that a mouse with incredible battery life vs rechargeable capabilities can make or break a long trip. If I have to hunt for a Type-C cable every two days just to keep my cursor moving, the whole “seamless” dream falls apart.

    Optical Sensor Technology Precision Without the Physical Tether

    Optical Sensor Technology Precision Without the Physical Tether.

    When you’re working from a cramped cafe table or a makeshift desk in a rental apartment, you don’t have the luxury of a massive mousepad to compensate for a cheap sensor. This is where optical sensor technology actually matters. I’ve learned the hard way that a subpar sensor will jitter the second you hit a textured surface or a bit of dust. You want something that tracks smoothly across almost any surface, because my “office” changes more often than my coffee order.

    If you’re moving into more intensive tasks—maybe some light video editing or even just high-precision UI design—you need to look closely at the dpi settings explained in the product specs. Higher DPI isn’t always better; it’s about finding that sweet spot where the cursor feels like an extension of your hand rather than a floating icon. I aim for a sensor that feels completely transparent, meaning I stop thinking about the hardware and start focusing entirely on the code or the configuration I’m building.

    Five Ways to Stop Your Mouse From Sabotaging Your Flow

    • Prioritize multi-device pairing. If I’m switching between my laptop and a tablet in a cafe, I don’t want to be fumbling with a dongle; I need a mouse that lets me jump between screens with a single button press.
    • Check the polling rate, not just the DPI. High DPI is flashy, but a consistent, high polling rate is what actually prevents that jittery, “laggy” feeling when you’re trying to navigate a complex UI on a mediocre Wi-Fi connection.
    • Go for a rechargeable internal battery over replaceable AAAs. Nothing kills my focus faster than realizing I’m mid-sprint and my mouse is dead. I need something that I can top up via USB-C just like my phone.
    • Don’t overlook the weight. If you’re traveling as much as I am, a heavy, chunky mouse is just extra dead weight in your tech pouch. Aim for something lightweight that feels like an extension of your hand, not a brick.
    • Test the surface compatibility. Since I spend half my life working on wooden cafe tables or hotel desks, I need to know the sensor won’t lose its mind the second I move away from a dedicated mousepad.

    The Bottom Line: Finding Your Flow

    Don’t overcomplicate the tech; just prioritize a connection that doesn’t drop when you’re working from a cafe with spotty Wi-Fi.

    Aim for a sensor that’s precise enough to handle your actual workload without needing a massive, dedicated mousepad everywhere you go.

    Your gear should be an extension of your hand, not a distraction—if you’re thinking about your mouse, it’s probably the wrong one.

    The Philosophy of Frictionless Gear

    “A wireless mouse isn’t about the novelty of cutting a cord; it’s about removing the physical friction between your intent and the screen. If I have to think about my hardware, the hardware is failing me.”

    Elias Vandermeer

    The Final Setup Check

    The Final Setup Check: cable-free desk.

    At the end of the day, picking a wireless mouse isn’t about collecting the most expensive tech on the market; it’s about finding that sweet spot where hardware meets habit. Whether you’re prioritizing a rock-solid Bluetooth connection to save a dongle in your bag, or hunting for a high-end optical sensor that doesn’t jitter when you’re working off a cafe table, the goal remains the same. You want a tool that doesn’t demand your attention. When you’ve balanced connectivity, sensor precision, and ergonomic comfort, the mouse effectively disappears, leaving you with nothing but your actual work and a clean, cable-free desk.

    I’ve learned through a lot of trial and error—and a few cluttered backpacks—that your gear should serve your mobility, not restrict it. We live in a world where our offices are wherever we decide to open our laptops, so don’t let a tangled cord or a laggy sensor be the thing that breaks your flow. Invest in tools that are seamless and portable. Build a setup that moves with you, stays out of your way, and lets you focus on the big picture. After all, the best tech is the kind you forget you’re even using.

    Frequently Asked Questions

    How much does battery life actually matter when I'm working from cafes with limited outlets?

    Honestly, it’s everything. When I’m hunkered down in a corner cafe with one working outlet and a dying laptop, the last thing I want to do is hunt for a spare USB port just to keep my mouse alive. I aim for gear that lasts weeks, not hours. If you’re serious about a mobile setup, look for mice with long-range efficiency or USB-C quick charging. Don’t let a dead peripheral kill your flow.

    Is there a noticeable lag between Bluetooth and a 2.4GHz dongle when I'm doing more precise work?

    If you’re doing anything that requires actual precision—like fine-tuning a UI layout or light photo editing—yes, you’ll feel it. Bluetooth is fine for browsing or casual emails, but it has this micro-stutter that can drive you crazy when you’re trying to be exact. For the heavy lifting, stick to the 2.4GHz dongle. It’s more stable and keeps that latency low enough that the tech actually stays invisible.

    Can I find a wireless setup that doesn't feel like a bulky piece of plastic in my tech pouch?

    Honestly, yeah. If you’re living out of a tech pouch like I am, you can’t afford to carry around a bulky gaming mouse that takes up half your bag. Look for “low-profile” or “travel-sized” mice—specifically ones designed for ultra-portability. I usually go for something slim with a magnetic charging lid or a built-in USB dongle that doesn’t stick out. If it doesn’t slide into a side pocket effortlessly, it’s not worth the space.

  • Finding an Ergonomic Mouse for Your Setup

    Finding an Ergonomic Mouse for Your Setup

    I was sitting in a cramped cafe in Tallinn last month, trying to finish a cloud migration script, when a sharp, familiar ache shot through my wrist. I looked down at my standard, flat-bottomed mouse and realized I was basically fighting my own hardware just to get through the day. Most people think you need to drop $200 on some futuristic, glowing peripheral to fix this, but honestly, most of the advice in a typical ergonomic mouse guide is just marketing fluff designed to sell you features you’ll never actually use. You don’t need more buttons; you need a tool that actually fits your hand.

    I’m not here to sell you on the latest RGB-heavy gaming nonsense or overpriced gimmicks. My goal is to give you a practical, no-nonsense look at what actually matters: hand position, weight distribution, and portability. I’ve tested enough gear across dozens of different desk setups to know which mice actually disappear into your workflow and which ones just add clutter. This is a real-world ergonomic mouse guide built for people who want to focus on the work, not on managing their wrist pain.

    Table of Contents

    Vertical Mouse Benefits Redefining Your Natural Wrist Posture

    Vertical Mouse Benefits Redefining Your Natural Wrist Posture

    If you’ve ever spent eight hours straight clicking through cloud dashboards only to feel that dull, aching tightness in your forearm, you know exactly what I’m talking about. Most standard mice force your hand into a “palm-down” position, which essentially twists your forearm bones into a permanent state of tension. Switching to a vertical design changes the game because it allows for a “handshake” grip. This shift is one of the most effective ways of preventing carpal tunnel syndrome because it keeps your radius and ulna parallel rather than crossed.

    When I first integrated a vertical mouse into my mobile setup, the adjustment period was real, but the payoff was immediate. It’s not just about comfort; it’s about long-term sustainability. By prioritizing wrist posture for computer users, you’re essentially future-proofing your career. You don’t want to be the person who has to retire from tech early because of a preventable injury. Investing in these kinds of ergonomic computer peripherals means your gear is working to support your body, rather than forcing your body to adapt to a flawed design.

    Beyond the Desk Ergonomic Computer Peripherals That Travel

    Beyond the Desk Ergonomic Computer Peripherals That Travel

    Since I’m rarely in the same zip code two weeks in a row, my gear has to be as mobile as my lifestyle. It’s one thing to have an optimal workstation setup when you’re anchored to a dedicated desk, but the real test happens in a cramped coffee shop or a shared workspace with questionable seating. I’ve learned the hard way that ignoring ergonomic computer peripherals when traveling is a fast track to burnout. If I’m forced to use a trackpad or a flat, cheap mouse for ten hours straight, I can feel my wrist protesting by sunset.

    I usually pack a slim, high-performance mouse that doesn’t sacrifice comfort for portability. It’s all about finding that middle ground where the device is light enough for my tech pouch but still supports proper wrist posture for computer users. I don’t go overboard with massive, heavy-duty gaming mice when I’m on the move, but I refuse to settle for anything that feels like a toy. The goal is to maintain a consistent level of comfort regardless of where I’m logging in from, ensuring my focus stays on the code and not on a dull ache in my forearm.

    Small Tweaks to Stop the Wrist Strain Before It Starts

    • Stop the “claw grip” death march. If you find yourself squeezing your mouse like you’re trying to crush a soda can, you’re asking for carpal tunnel. Aim for a grip that lets your hand rest naturally, not one that requires constant tension.
    • Watch your desk height, not just your mouse. If your mouse is sitting on a surface that forces your elbow to flare out or your wrist to angle up, even the most expensive ergonomic mouse won’t save you. Your forearm and hand should stay in a relatively straight line.
    • Don’t ignore the sensor. Since I move around a lot, I’ve learned that a cheap sensor on a mediocre surface is a productivity killer. If you’re working from a cafe or a library, make sure your mouse has a high-quality sensor that can track on almost any surface without needing a dedicated pad.
    • Size matters more than you think. A mouse that’s too small forces your fingers to curl unnaturally, and one that’s too big makes you reach too far. I always check the dimensions against my hand span before I commit to a new setup.
    • Use your whole arm, not just your wrist. This is a big one. Instead of pivoting your wrist left and right to move the cursor, try to use your elbow and shoulder to guide the movement. It feels weird at first, but it takes the massive amount of repetitive stress off those tiny tendons in your wrist.

    The Bottom Line: Gear That Moves With You

    Prioritize a vertical design if you’re feeling that midday wrist ache; your anatomy shouldn’t have to adapt to your hardware.

    If it isn’t portable or easy to pack, it’s dead weight—choose peripherals that fit your nomad lifestyle without sacrificing ergonomics.

    The best tools are the ones you stop noticing; aim for a setup so seamless that it disappears, leaving only your work behind.

    The Invisible Tool

    If you’re constantly adjusting your grip or feeling that dull ache in your wrist by noon, your gear is failing you. A good mouse shouldn’t feel like a piece of hardware; it should just be an extension of your hand that lets you stay in the zone.

    Elias Vandermeer

    Finding Your Flow

    Finding Your Flow with the right mouse.

    At the end of the day, picking the right mouse isn’t about chasing the most expensive specs or the flashiest RGB lighting. It’s about finding that sweet spot where your hardware stops being a distraction and starts being an extension of your hand. Whether you decide to go vertical to save your wrists from that repetitive strain or you invest in a lightweight, travel-ready peripheral that can handle a coffee shop Wi-Fi session, the goal remains the same: minimizing friction. You’ve looked at the posture benefits, the portability requirements, and the tech that actually moves with you. Now, it’s just about matching the tool to your specific rhythm.

    Don’t get caught in the trap of thinking a perfect setup is something you eventually “reach” and then stop working on. Your gear should evolve as your workflow does, especially if you’re someone who refuses to be tethered to a single desk. If a piece of tech starts feeling clunky or causes that familiar ache by mid-afternoon, it’s time to swap it out. Invest in tools that disappear into your workflow so you can focus on the actual output, not the discomfort. Build a setup that supports your freedom, because your workspace should adapt to your life, not the other way around.

    Frequently Asked Questions

    Is a vertical mouse actually practical when I'm working from a cramped cafe table or a plane tray?

    Honestly? It’s a trade-off. If you’re squeezed into a tiny cafe corner or a plane tray, a bulky vertical mouse can feel like you’re trying to maneuver a brick in a shoebox. It takes up way more real estate than a slim travel mouse. But, if you’re doing long sessions, that wrist strain is real. My move? I keep a compact, low-profile mouse for travel and save the vertical setup for when I actually have a decent desk.

    Can I actually get used to the learning curve, or am I going to be fighting my muscle memory for weeks?

    Honestly? You’ll probably fight it for a few days. It’s annoying, I get it. Your brain is wired for that standard claw grip, and switching to a vertical setup feels like learning to write with your non-dominant hand. But don’t let that stall you. Usually, by the end of week one, the muscle memory resets. Once it clicks, you won’t even notice the mouse is there—and that’s exactly when you know it’s working.

    How much do sensor quality and DPI matter if I'm prioritizing ergonomics over gaming?

    Honestly? Not as much as the hype suggests. If you aren’t clicking heads in a fast-paced shooter, you don’t need a sensor that tracks micro-movements at a professional level. For my workflow, I care more about how the mouse shape fits my hand during a long session than having a massive DPI range. Just make sure the sensor is decent enough that it doesn’t jitter on a coffee shop table. Smooth is better than fast.